As much as I don't want to think about it the gardening season is coming to a close. True, most vegetables will keep producing until the first frost but the days are getting a little cooler and a little shorter. Soon, winter will be upon us and so will a steady diet of root vegetables. Last year I experimented a little with hoop house gardening which allowed me to grow spinach during the coldest of weather and deep snow. I want to expand the variety of vegetables I grow this year of course.
But, all this talk of cold weather is a bit premature. Let's enjoy the last couple of weeks of summer while we can. Fall begins...September 23rd!!! Bring on the turnips!
Until then, enjoy these pictures I took in my garden yesterday. It isn't too late to talk about gardening. Feel free to ask questions!
Last week I brought you a recipe using the most versatile ingredient in the world, kale! I've talked about how nutritious kale is in previous posts so I won't bore you with the details again but I do want to remind you of how cheap and delicious it is. The variety of kale used in this recipe, called Tuscan kale, was grown at the Towson University Urban Farm.
I also used chickpeas in this recipe. Did you know that chickpeas are the most consumed bean in the world? I've always wondered how this was possible. Chickpeas are the backbone of hummus so...there's that. Maybe that's why it is the most eaten bean in the world. Surely kidney beans are the champion of beans. They seem to be in everything! As I pondered these questions, perhaps longer than any sane person should, I turned to my pantry and found 4 cans of chickpeas! How in the hell did that happen? So, I guess it is true. Chickpeas are the mostly widely consumed bean. They are the ninjas of the bean world. They're great at getting into places without you noticing! So, I hope you enjoy the recipe. Get cooking and enjoy!
1 bunch of kale
1 medium red onion, thinly sliced
olive oil
chopped garlic
1 teaspoon of red pepper flakes (optional)
salt
2 tablespoons balsamic vinegar
1/2 teaspoon soy sauce
1/4 teaspoon sugar
1 can of chickpeas
Remove any large stems from the kale. Tear or cut the kale into bite-sized pieces. You can finally chop the stems and add them to this recipe. Just cook them until tender.
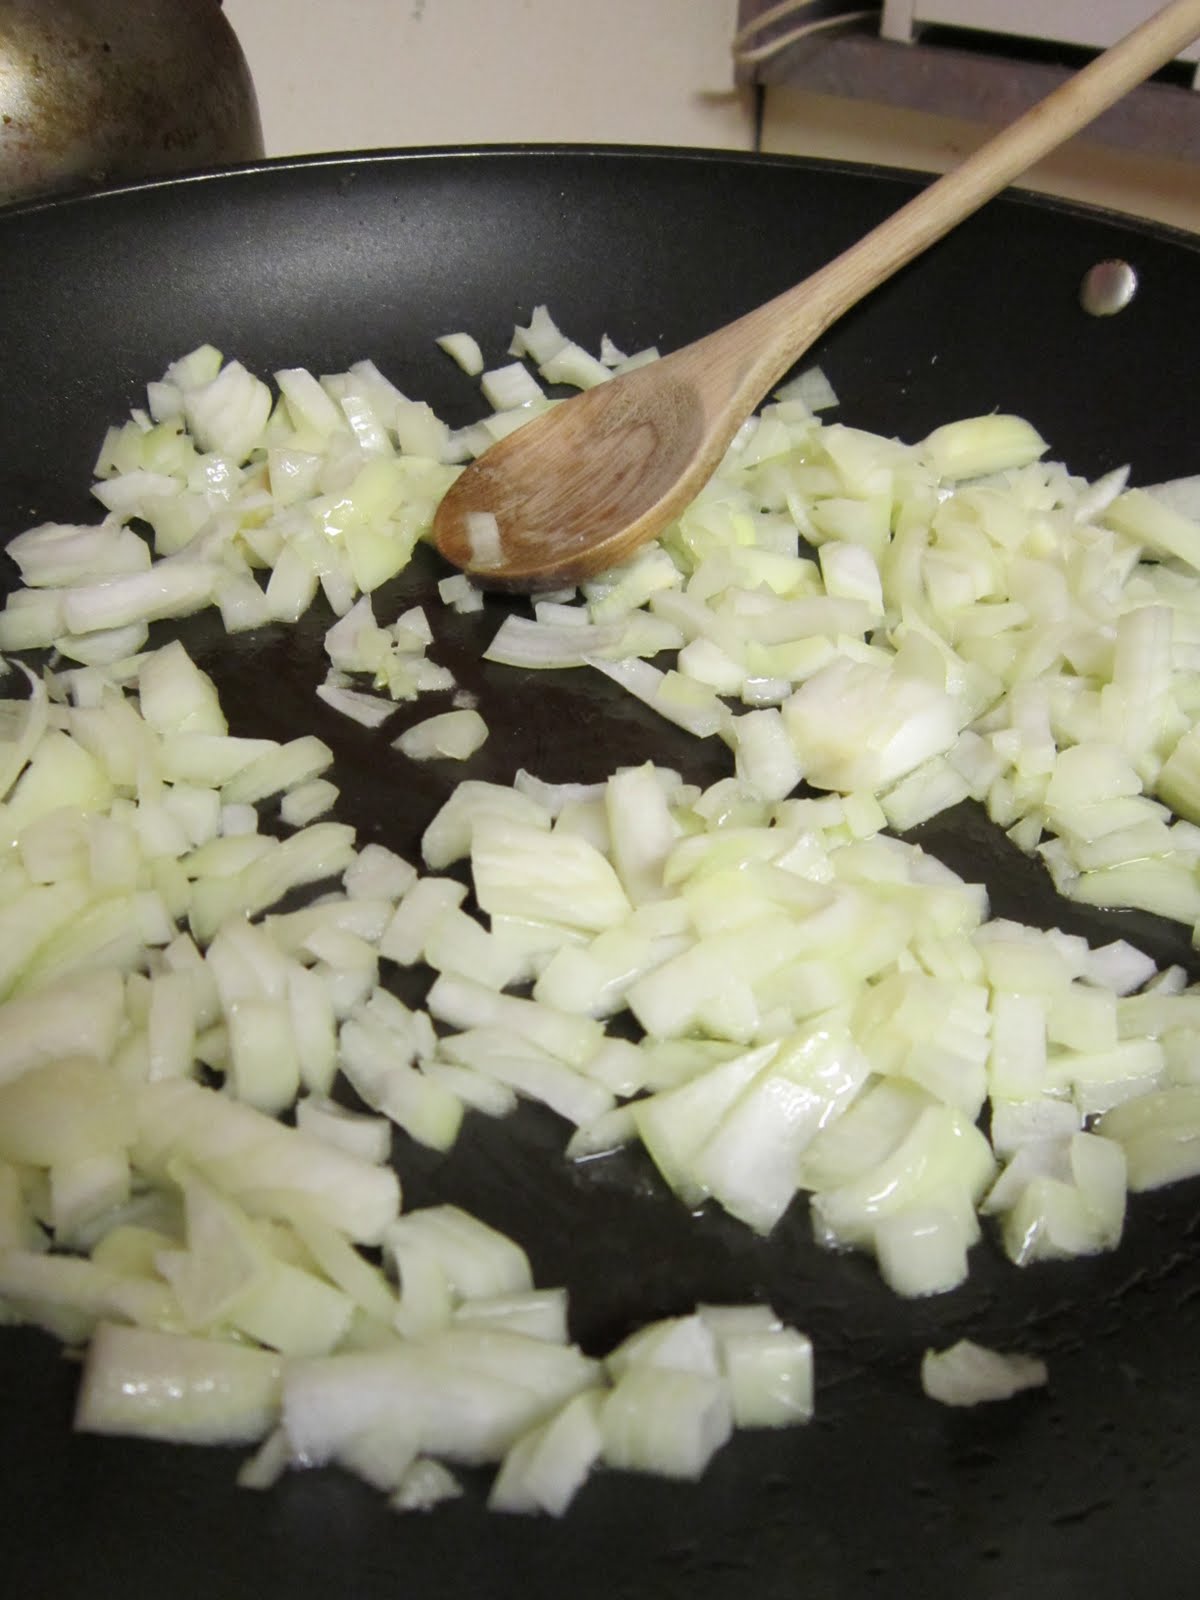
In a pan, heat the olive oil and sauté the onion until transluscent. Add the garlic and red pepper (if you're using them) and stir, for about a minute. Add the kale, stir, and cover until the kale has wilted but still bright green (stirring occasionally). Salt to taste and remove the kale and onions from the pan. Leave any liquid that may be left.
Add the balsamic vinegar, soy sauce, and sugar to the liquid in the pan. If there is no liquid add a tablespoon of water. Add the chickpeas and cook, stirring, over medium heat until the liquid is reduced by about half. Now combine the chickpeas with the kale and onions. That's it!
Don't look directly at the kale. It is far to green and delicious.
Ah, yeah! Chickpeas bathing in balsamic...crazy.
This looks so good! I burnt my tongue trying to get an early taste.
This week I bring you Kale Pesto! I've been overrun by kale from my own garden and from the Towson University Urban Farm so I wanted to find a recipe that would allow me to use a large bunch of kale all at once. I found this week's recipe in the food column of the Towson University school newspaper, the Towerlight. The Towerlight's food columnist just happens to be a member of the urban farm as well! I hope I do her recipe justice.
Kale is probably my favorite leafy green because it is so versatile and not to mention...cheap. I've spoken of the benefits and low cost of greens before (here) so I won't bore you with those details again. If you are looking for a cheap and healthy alternative to pasta sauce this recipe is for you. I have also used it as a spread on my morning bagel. I've taken my own liberties with this recipe by leaving out the feta cheese, to keep it vegan friendly, and by adding a handful of fresh basil from my herb garden. We both chose not to use the traditional pine nuts in the recipe. I don't know of any graduate student that can afford pine nuts anyway so why bother. You can read the original recipe here. Enjoy!
4 cloves of garlic, peeled
4 small onions, peeled and chopped into quarters
1 small bunch of kale (about 1/2 pound), stalks removed, washed well
1/3 cup extra virgin olive oil
A handful of fresh basil leaves
Salt and pepper
1. Bring a pot of water to a boil and add plenty of salt. Add the whole garlic cloves and onion. No need to chop them. This is all going into a food processor or blender.
2. Boil the onions and garlic for a few minutes stir in the kale and cook for another 10 seconds. Remove the kale, garlic, and onions from the water.
3. Use a food processor or blender to puree the ingredients, along with the olive oil and basil. Work in small batches! If the mixture is too think add a teaspoon of water until you reach the desired consistency. Adjust the taste with salt and pepper if needed.
Chopping onions and garlic
A big pile of green kale trying to smother my Santoku knife.
Boil the ingredients but make sure not to cook them!
I really do love the summer time. Besides the obvious outdoor adventures that come with the warmer weather, grilling out with friends, and longer days, you will also find a bounty of fruits and vegetables at your local farmer's markets and CSA's (Community Supported Agriculture). This past week I had the good fortune of chatting with individuals from Real Food Farm, an urban farm in Northeast Baltimore. The farm is only 2 years old but they have already greatly improved access to healthy food in the northern Baltimore area. The folks at Real Food Farm were very helpful and gave sage advice regarding the Towson University Urban Farm and what we can do to improve yields but still maintain our mission of sustainable agriculture.
While talking with the members of Real Food Farm I decided to buy some fresh produce that unintentionally made it into the background of this week's Tasty Tuesday photos. So enjoy the pictures of beets, eggplant, and an unusual variety of cucumber called Striped Armenian. Between the vegetables coming out of my own garden, the Towson University Urban Farm, and the produce purchased from Real Food Farm, I'M RUNNING OUT OF COUNTER SPACE! But, what a wonderful problem to have.
I have been so impressed with the abundance of summer squash right now that I began to search for recipes that could be used to get rid of my zucchini surplus in my fridge. I also acquired a massive amount of fresh corn during my trip to my home state 2 weeks ago and wanted to find a way to use that as well. So this week I give you Tacos de Calabacitas. I modified this recipe from the New York Times Temporary Vegetarian series.
extra-virgin olive oil
minced onion (one medium sized onion will be fine)
yellow summer squash (one medium sized one was enough for me)
diced zucchini (I used two that were medium sized)
corn kernels (I used fresh corn but frozen will do)
1 jalapeño, stemmed, seeded and finely chopped
diced tomato or quartered cherry tomatoes (used fresh from my garden)
oregano
salt
Monterey Jack cheese, grated
tortillas (I used whole wheat but corn will work great too)
In a pan over medium heat, heat the oil. When the oil is hot add the onion and saute until translucent. Add the diced yellow squash, zucchini, corn, and jalapeno. Saute until the zucchini is browned. Then, add the tomatoes, oregano, and salt to taste.
Cover the pan and reduce the heat to medium low, stir the mixture once in a while to prevent burning. Once liquid begins to form in the bottom of the pan, uncover, and add salt if needed. Remove from heat but keep warm.
Warm tortillas (I just browned mine lightly in a skillet over high heat). Add the summer squash filling and sprinkle with cheese. You can leave out the cheese for a vegan dish.
I made a couple of surprising discoveries working in my garden this evening. Both were welcome surprises but one was less so. While tending to one of my tomato plants I noticed that two green Allerbest tomatoes had fallen to the ground. One of the tomatoes looked like it had been munched upon but I couldn't quite figure out what animal was responsible. It hadn't fallen victim to an insect infestation nor had it been pecked to an early death by a European Starling (a fate that a few of my tomatoes had last year). It wasn't until I picked up the second tomato that I noticed a perfect imprint of a small set of teeth.
Who would have taken a small sample bite into a green tomato and then left it on the ground for me to find? Surely my neighbors aren't walking around my garden when I'm not home and planting their chompers into whatever they feel like. It wasn't until a little later in the evening when my roommate commented that the night before he had seen a deer in our front yard eating the grass in our extremely unkept yard! Ah, of course. A passing deer decided to to come by and sample a green tomato and apparently didn't care for it.
I have dealt with my fair share of garden pests. Last year I had a massive outbreak of Harlequin bugs, Murgantia histrionica, that wiped out my kale and spinach. This year I had an infestation of lettuce aphids and I found my first Harlequin bug egg casing yesterday on the underside of a broccoli leaf. I would never apply pesticides to any of my food so when I begin to see signs of insect infestation I begin the insect massacre! And I don't stop squishing until I'm satisfied that the threat is over! I know what signs to look for this year so I have averted disaster for the most part. Noticing the signs of insect infestation comes with experience.
But, for reasons I can't quite figure out right now a deer in my yard is a very welcome site. I think I just like knowing that this deer can survive in an incredibly urban environment when so much of biodiversity has been destroyed due to urban sprawl. I don't mind if the occasional deer comes up for a nibble every now and then. But, dude.....wait until the tomatoes are ripe. They will be way more enjoyable.
But, I must say that if one decides to grow a garden free of harmful pesticides you must be willing to accept and appreciate the insects that will take up residence. I am an entomologist by trade so I have a love of insects that most of the general public doesn't understand and I will admit that I find it incredibly funny seeing a screaming adult run away from a harmless insect. Insects have been here millions of years longer than us and they will be here long after we're gone. This is their home. We're just visiting so show some respect. It is fear of insects that drives the use of pesticides in the first place. We don't like the thought of an aphid on our collard greens but for some reason most people find that spraying our food with poison is a reasonable alternative. Get over your fear.
My second discovery of the night happened only a few minutes later when I noticed that on the opposite side of the sidewalk that boarders my front lawn there was a tomato plant growing near a fire hydrant. I obviously didn't plant it there (that would be ridiculous). My best guess is that a few seeds from last year made their way out of my garden (possibly from a fallen tomato), across the sidewalk, and found a suitable place to germinate and grow in the small grassy strip next to the road. To quote Dr. Ian Malcolm, "Life, uh...finds a way."
I'm certain that whoever decides to mow the area in the upcoming weeks will mow it down subsequently killing it. It's a shame really. Any open space is a perfect spot for a public tomato plant. Wouldn't it be awesome to pick a few delicious tomatoes off of a nearby plant when you are on a run or walking the dog? Maybe I'll try to save it and relocate it to a place where people are less mower happy. In the meantime...
The mighty chickpea! Is there anything it can't do? It's the most consumed bean in the world you know. Today I bring you a recipe for Chickpea and Red Pepper Salsa I found at FatFree Vegan Kitchen. This is a great dish to make if you want a late night healthy snack or if you are entertaining a few friends. Honestly, it is less like a salsa and more like an alternative to hummus. I had some arugula from my garden that needed to be used and this seemed like the perfect dish. If you don't have arugula any slightly spicy leafy green will do. Serve this dish with some pita bread or another type of flat bread. Enjoy!
·1 15-ounce can chickpeas, rinsed and roughly chopped
·4 scallions, sliced
·1 cup arugula, chopped
·2 jarred roasted red peppers
·2 tablespoons fresh lemon juice
·2 tablespoons extra-virgin olive oil
· salt and black pepper
·pita or flat bread
In a medium bowl, combine the chickpeas, scallions, arugula, red peppers, lemon juice, oil, 1/2 teaspoon salt, and 1/4 teaspoon pepper. Serve with pita or flat bread.
Grilling season is in full swing! I've always enjoyed grilling out with friends and at one time it was a weekly and sometimes bi-weekly event. I haven't been able to grill as much as I used to but I still enjoy inviting friends over, having a few beers, and grilling food. A lot of people think that grilling is only for meat eaters but I say NAY! Besides the endless varieties of veggie burgers, tofu hot dogs, and soy sausages, which are all really tasty, the grill can be used for a wide variety of vegetarian dishes.
This week I bring you Grilled Vegetable Quesadillas with Rhubarb Salsa. Veggie quesadillas are a great and easy way to feed a crowd and with the addition of rhubarb salsa you can't go wrong. This is honestly the first time I had made anything with rhubarb so it has always been a bit of a mystery. I had actually never tasted it until someone recently made a strawberry and rhubarb pie. My local grocery store had plenty on hand and for a very good price so I had to buy a few stalks. Rhubarb has a bit of a sour taste but not too much. It goes great with sweet items and even balances nicely with spicy items like the ingredients found in this salsa. Enjoy!
Vegetable Quesadillas
2 tablespoons olive oil
1 tablespoon pureed chipotle chilies in adobo sauce
1 red bell pepper
8 whole green onions
2 small zucchini or yellow squash, quartered lengthwise
whole wheat flour tortillas
shredded cheese (I used a 4-cheese Mexican blend)
1/4 cup chopped cilantroSour cream, guacamole (optional)
Combine oil and chilies in adobo sauce. Set aside 1 tablespoon of the mixture. Brush remaining mixture over both sides of vegetables or use as a marinade.
Cut bell peppers and zucchini crosswise into 1/4-inch slices.
Grill vegetables until tender, turning occasionally.
Sprinkle half of cheese over four tortillas; drizzle reserved oil mixture over cheese. Top with grilled vegetables, cilantro, remaining cheese and tortillas. Grill quesadillas over medium-low coals 3 minutes per side or until cheese is melted and tortillas are lightly toasted. Cut into wedges and garnish with sour cream, rhubarb salsa and guacamole, if desired.
Rhubarb Salsa
2 medium stalks rhubarb split lengthwise and cut into 1/4 inch chunks
1/3 cup finely minced scallions
1 jalapeño, seeded and minced
1/2 cup pickled cocktail onions, halved (finely chopped white onion can be substituted)
2 teaspoons honey
3 tablespoons cider vinegar
Salt
Chipotle powder or cayenne (optional)
Have a bowl of ice and water ready. Bring 2 quarts of water to a boil in a saucepan or pot, add the rhubarb, blanch 20 seconds, then scoop out with a slotted spoon into the ice water. After a minute, drain well and transfer to a medium-size bowl.
Fold in the scallions, jalapeño and cocktail onions.
Blend the honey into 1 tablespoon of the vinegar and add. Season with about 1/4 teaspoon salt and chipotle or cayenne to taste if desired.
Last week I blogged about the affordability of various greens. They're in season now and abundant at your local grocer or farmer's market. I've decided to keep the leafy green train rolling this week with a recipe I found at Vegetarian Times of Thai red curry, eggplants, and mustard greens! Who doesn't love Thai food? It is the perfect balance of spicy, sweet, and sour somehow magically rolled into one dish.
This is also a great recipe for cleaning out the refrigerator or pantry. I actually had everything on hand except for the eggplant. The only item that you might have trouble finding is the red curry paste. However, if you visit any Asian or international food market I guarantee they will have a massive supply and it is also extremely cheap. I purchased two cans of red curry paste for $1 and it keeps forever. Also, for those of you who don't like spicy food (and I will never understand why you don't) you can always go with a yellow curry paste instead of red. Green curry paste is the spiciest so you may want to avoid that. Enjoy!
2 Tbs. Thai red curry paste
1 Tbs. sugar
1 clove garlic, minced (1 tsp.)
1 Tbs. vegetable oil
1 small eggplant (8 oz.) cut into 1-inch-thick chunks
1 small onion, quartered and sliced (1 cup)
Mustard greens, trimmed and cut into 1-inch pieces. Use as much as as little as you want.
1/4 to 1/2 cup light coconut milk
Lime wedges
Whisk together curry paste, sugar, garlic, and 2 Tbs. water in small bowl. Set aside.
Heat oil in wok or large skillet over medium-high heat. Add eggplant and onion, and cook until eggplant is browned. Stir in the red curry mixture, and cook until vegetables are coated.
Add mustard greens, and cook until leaves are wilted. Stir in coconut milk and 1 1/4 cups water, and season with salt, if desired. Cover, and bring to a simmer. Reduce heat to medium-low, and simmer until eggplant is tender. Serve with rice and a few lime wedges if desired. I also included a dish of soy sauce and chives.
The red curry paste! So spicy! (not really)
The eggplant and onions getting cozy
Chop the mustard greens using your sweet Santoku knife of truth. Mine is lurking in the background.
Coat the cooked vegetables with the curry paste. Ah...it's like a spicy blanket!
Pour in a little light coconut milk. Make sure to block your lighting so your picture has a nice shadow and you can barely see the food like I have done here.
Finally! A Tasty Tuesday post on an actual Tuesday. This week we will be exploring the wonderful world of cheap greens! Greens, like mustard, collard, cabbage, and or course, kale, are in season right now and are incredibly abundant and not to mention.....cheap, which is always a good thing. In fact, I bet it would be hard to find any of those items for more than $0.99 a pound. Additionally, a medium sized bunch of kale, mustard, collard greens, or a head of cabbage will be enough to make several different meals. So, my advice is buy as much as you can and get creative.
Besides the obvious affordability of greens they are also super healthy for you. Can't we all use a little more money in our pocket and a little less cholesterol clogging our arteries? So this week, I bring to you Vegan Cabbage Rolls! Enjoy!
1 head of cabbage
1/2 cup of brown rice
1/2 cup of lentils
2 tablespoons of olive oil
garlic (as much as you want)
1 small onion, diced
1 15 ounce can of chopped tomatoes with the liquid (or pasta sauce)
3/4-1 cup of vegetable stock
2 tablespoons of capers
salt and pepper
In a pot, cover the brown rice and lentils with water, bring to a boil, and then reduce heat to medium low and cook until tender.
Heat the oven to 350F. Bring a large pot to a boil. Place cabbage leaves (as many as will fit) into the pot and boil until the leaves soften (this will take a few minutes). Then set aside.
In a skillet, heat the olive oil, add the onion and cook until translucent. Add the tomatoes and liquid, garlic, the vegetable stock, and caper and cook for another 5 minutes or so until the liquid has reduced somewhat. Add salt and pepper to taste
Lay the cabbage leaves out and spoon in brown rice and lentil mixture. Add the tomato sauce mixture on top of that and then fold the cabbage leaves (burrito style) and place seam side down in a small baking dish. Repeat until you have no more rice and lentils, or no more cabbage leaves, or no more space in your baking dish. You may also pour any remaining liquid over the cabbage rolls to prevent them from drying out.
Cover the baking dish loosely with tin foil and place in the oven. Bake for about 20 minutes or until everything is heated through.
I know....I know. I'm late again. I've been burning the candle at both ends trying to finish this grad thesis. I've had to put a few things on the back burner. But, I have returned and this time I have brought pickles. I've written before about food preservation and my goal to have a waste free garden this year. I decided this past week to learn how to make my own pickles, and with the help of a family recipe that was given to me recently, I did just that. My garden hasn't produced any cucumbers of its own yet, so I bought two large cucumbers from my local grocery store instead, but I do have a ton of fresh dill. I figured that this will be practice before I become overrun by cukes in the next couple of months.
The process was MUCH easier than I thought and took very little time. This is a dill pickle recipe but there is an endless variety of pickles you can make. I'll explore those later. So, if you're looking for new ways to use those left over cucumbers or just want to get on the DIY bandwagon. Give pickling a try.
This recipe will make a couple large jars of pickles or maybe 3 small ones.
2-3 medium sized cucumbers
1qt. water
1c. vinegar
1/4 cup of salt
To each canning jar add the following:
1 clove of garlic
a few sprigs of fresh dill
2 tsp. pickling spice
Combine 1 quart of water, 1 cup of vinegar, 1/4 cup of salt in a small pot and bring to a boil. Once the liquid begins to boil reduce the heat to medium low and stir until all the ingredients are combined (basically until you can't see any salt).
Let the liquid cool completely. You don't want to cook the cucumbers when you add the liquid to the jar.
To each jar add a clove of garlic and a few sprigs of dill.
Cut the cucumbers into thin slices and fill the jars.
Next, add two teaspoons of pickling spice to each jar. I added one teaspoon before the cucumbers went into the jars and another teaspoon after.
Fill the jars with the cool liquid. Do not fill the jars completely full. You will need about 1 inch of head space between the jar lid and the liquid.
Keep the jars in a the refrigerator. The longer you let the cucumbers marinate the better.
A couple of cucumbers are about to feel the wrath of my sweet Santoku knife.
A sprig of fresh dill I grew in my garden. No big deal...I just cultivated life, that's all.
Sliced cucumbers, sprigs of dill, and a clove of garlic nestled snuggly in a glass jar.
The finished product with pickling spice. Looks way better than Vlasic.
For this week's Tasty Tuesday post I wanted to do something a little different. I enjoy posting new recipes and that will continue but this week I wanted to write about another transition in my life. Needless to say, this post took a lot longer to write than my usual posts so I apologize for being a day late. Over the past year or so I noticed that I had been slowly transitioning to a meat free diet. It was unintentional at first, mainly due to the fact that poor graduate students can't afford choice cuts of beef, pork, fish, or poultry and are usually left eating the cheap pressboard style lunch meats found in your local grocery store next to the Lunchables (barf). When I finally realized that I had gone a few weeks and then a few months without eating meat I started thinking, "Can I go even longer with no meat?
When I began pondering a meat free lifestyle I was neck deep in training for my half-marathon. Along with running I was also lifting weights at the gym three days a week and I never felt better in all my life. I was happier, more energetic, and I had lost nearly 20 pounds that had been hanging on me since the end of high school. Of course I attributed most of that to the increased exercise but anyone who exercises regularly knows that DIET IS EVERYTHING! I began doing a little research into the vegetarian lifestyle and looking through my recipe index for the vegetarian recipes I already had. Then, I just thought....let's do this.
I've come to find out that my particular journey into vegetarianism wasn't typical. Most vegetarians have a meat free diet based on ethics and believe that it is no longer necessary to slaughter any animal in the name of human nutrition. While I certainly believe in the ethical treatment of all animals (including humans) I wasn't motivated by ethics. I still recognize animals as being sources of food and the slaughter of animals for consumption didn't particularly bother me. However, what did bother me was the way we slaughter animals for food in the United States and this is the crux of my story.
Meat is a commodity in this country. Marketers have done an incredible job of making Americans think that you need meat at every meal. "Beef, it's what's for dinner! Bom Bom Bom". "Pork, The Other White Meat" And now the new slogan, "Pork, Be Inspired"! Because of this and many other factors, demand for meat has sky rocketed and subsequently the way meat was produced had to change also. Meat (especially beef) is the product of enormous feed lots all over the country that hold thousands upon thousands of animals at any given moment. These feed lots are a major source of pollution to both water and air and are partly responsible for the destruction of forests and loss of biodiversity. Additionally, with so many individuals in such a confined space, disease is rampant!
Get this, according to the Food and Drug Administration 80% of the antibiotics sold in the United States go to factory farm animals. That's 28 MILLION POUNDS of drugs! Under confined conditions factory farmed cattle, pork, poultry, and fish are susceptible to a number of diseases and are kept in pens containing their own feces as well as the feces of other animals. The antibiotics are then pumped into factory farmed animals to keep them alive long enough to be slaughtered and then end up on the dinner table. So it is quite probable that the meat purchased in grocery stores is diseased to some extent. Hungry yet? There's more!
According to an April 2011 report in the Journal of Clinical Infectious Diseases, 47% of meat products purchased at several grocery store chains around the country were infected with antibiotic resistant Staphylococcus aureus. This is the same bacteria that causes Staph infections and is responsible for more deaths in the United States than HIV. How does bacteria found in meat become resistant to antibiotics? Through overuse of antibiotics in the factory farming system. Liberal use of antibiotics used on animals will certainly kill most strains of bacteria but not all and thus antibiotic resistant strains will become more numerous and researchers will have to develop stronger antibiotics....to continue using on farm animals. It is literally an arms race. Now, it is true that cooking the meat properly will kill the bacteria but honestly why would you want to eat something that has the potential to cause skin infections if you handle it?
So, this leads to the main reason for my switch to a vegetarian diet. Over the years I have been very selective about where I spend my money and to what companies and organizations I give money to. If a company or organization is operating in a way I don't like I just don't shop there or use their products. I don't agree with the way meat is being produced in this country. Therefore, I won't give my money to companies that continue to operate this way. Plain and simple. The food system is broken and I really believe something catastrophic is going to have to happen in order for large scale farming practices to change. According to the CDC food born diseases are responsible for 76 million illnesses, 325,000 hospitalizations, and 5,000 deaths in the United States every year. What more is it going to take? 10,000 deaths?
I can't argue with how much better I feel. That's reason enough for me. I don't miss meat and in case you're wondering (and I know you are) I get all my protein from eating fresh fruits, vegetables, legumes, grains, nuts, and seeds. I'm not going to criticize those individuals who choose to still eat meat. This is my own personal argument. Honestly, if I had access to meat produced in a manner that I saw fit I might eat it and enjoy it (in moderation of course). But, as for now, this poor grad student will go to the farmer's market, look upon the organic, free range, antibiotic free, locally grown/harvested, beef, poultry, pork, and fish and admire the farmer for producing food the way it should be. BRING ON THE VEGETABLES!
Take care of yourself and each other...
P.S. if you want to see a very good reason why I won't give my money to companies that run factory farms see the video below.
So this has been on the "to do" list for quite a while. I have consulted a lot of Youtube videos, DIY blogs, and cheese monger websites to find an easy and inexpensive way to make your own soft cheese but with each new site came a new method and each site claimed their method was the best. So, I sort of cobbled together a lot of different instructions into an easy to follow recipe and I hit on a winning formula.
I made one of my favorite dishes, Palak Paneer, for a pot luck this last Sunday and I need a soft farmers cheese for the recipe. This, and the high cost of paneer cheese at the Indian market, was all the motivation I needed to finally try and make this style of cheese. The only thing you need for this recipe is a half-gallon of whole milk, 3 tablespoons of lemon juice, and some cheese cloth. That's it! No rennet tablets or aging. I actually had a roll of cheese cloth in my cabinet that I bought in order to brew a batch of beer with a couple of years ago. If you need cheese cloth you can find it at most grocery stores.
The version I make in this recipe is a plain cheese with no additional flavors. It will be very easy to modify the recipe to add your own fresh herbs if you choose to go that route. I may even try it again add some chives from my garden. So try it out this weekend. I think you'll be surprised. Enjoy!
1 half-gallon of pasteurized whole milk (ultra-pasteurized will not work).
Length of cheese cloth (folded in half longways) about 2.5 feet will be enough.
3 tablespoons of lemon juice (lime juice may work as well).
Pour the half-gallon of whole milk into a large heavy bottom pot at medium heat.
Bring the heat up very slowly, stirring the milk the entire time (a rubber spatula works great for this). It is important not to scorch the milk!
Once the milk begins to slightly boil (after about 15 minutes) add 3 tablespoons of lemon juice and reduce the heat to medium low. Continue cooking for an additional 5 minutes. At this point you should see the curds separating from the whey.
Turn off the heat and let cool for an additional 5 minutes
Line a strainer with cheese cloth, poor curds and whey into the cheese cloth, and let drain.
You should at this point have a nice pile of cheese curds. Tie the bag in a knot (about 2 inches above the ball of curds) and let drain over the sink for about 30 minutes. I tied my cheese cloth to the faucet.
Gently squeeze any excess liquid from the cheese cloth, unwrap the cheese, wrap again in plastic wrap, and allow it to cool in the refrigerator for about 2 hours.
Half-gallon of milk in the pot on medium heat.
Slowly increase the heat until it starts to boil. Remember to stir!
Once the lemon juice has been added you should see curds floating to the top.
You can't see me before the wedding!
Pour the curds into your cheese cloth and let drain for 30 minutes.
Wrap the cheese in plastic wrap and let chill in the refrigerator for 2 hours.
Wow, two Tasty Tuesday blog posts in a row...I've been lazy. My list of things I need to blog about is getting longer by the day but my actual posts are getting fewer and fewer. That will have change soon. Anyway, this week I bring you an easy, quick, and healthy recipe courtesy of the Fat Free Vegan Kitchen, one of the bazillion food blogs that I normally follow.
While I haven't made the jump to vegan I did switch to being a vegetarian without even realizing it. If that is a permanent switch remains to be seen but vegetarian food is all I have been consuming lately. Vegetarian/vegan cooking is on the increasingly long "to blog about" list so I think I will save those details for a later date but in the meantime enjoy this recipe. I was really surprised how great it turned out.
1 medium onion, chopped
2 cloves garlic, minced
1 tablespoon minced ginger
1 15-ounce can chickpeas
1 1/2 teaspoons curry powder (or adjust to taste)
1/2 teaspoon cayenne
1 15-ounce can diced tomatoes
1 cup cooked quinoa
salt to taste
Heat a medium-sized sauce pan over medium-high heat. Add the onions and season with salt and cook, stirring, until onions soften. Add garlic and ginger and cook for another minute.
Add the chickpeas, curry powder, and red pepper, and stir briefly. Add the tomatoes and cooked quinoa (for a recipe on how to cook quinoa properly click here), reduce heat to low, and cover. Simmer for about 10 minutes to allow flavors to blend. Add salt to taste.
Serve in wraps, pita bread, lettuce leaves or with naan. I chose whole wheat tortillas because I had those handy. I also added fresh spinach I picked that day from the Towson University Urban Farm.
Add 1 1/4 cups of water to 1 cup of quinoa. Cook on the lowest setting possible until the liquid is absorbed.